Before getting into the topic “How to publish a post in WordPress” all must know why we need to publish a post in our website. One of the biggest reason for blogging is to build a successful business. If you publish more content on your website, more pages from your website get indexed. This will increase organic search visibility and increases website traffic. Because the search engines always prefer blogging website. Blogging helps you to share what you and your employees are passionate about. It creates an opportunity for the business owners to connect with their customers and prospect through a two-way conversation. Your blog posts give you a unique opportunity to share your voice and personality, building up trust and increases your brand’s likeability quotient.
Steps to publish a Post in WordPress
- Create an Article
- Assign Categories in WordPress
- Adding Tags in WordPress
- How to Edit Permalink in WordPress
- Adding Images in WordPress
- How to Set Featured Image in WordPress
- How to Preview the Post
- Login to your WordPress account. In the left sidebar you have Post and then click Add New. This is the place where you will create an article.
- After that, Fill up the following fields.
- Under main settings, Enter the Title of your post in the first line. This should contain the keyword related to your article.
- In the next box, give a description of your article.
- Give affordable keywords that most of them used to search in search engine. Then, enable or disable the following ones such as noindex, nofollow as your wish.
- You can just create and save it in the draft to do further actions by using Save Draft
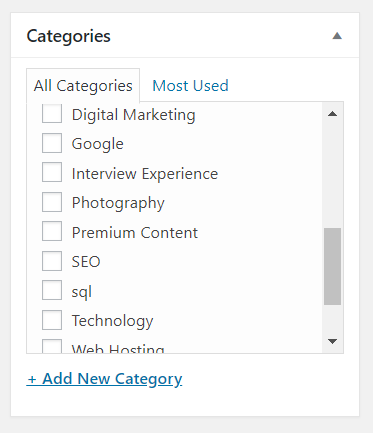
WordPress allows you to assign categories to your post. If the website has the number of posts, categories will group the related posts together and provides an easy way to tell the readers what the post is about. The WordPress posts have at least one category. If the site has only a few posts, by default it will assign as Uncategorized.
- On the right-hand sidebar, you can find Categories
- If the category you need to assign is already created, then you just click on the checkbox to select.
- If you want to create a new category, click on “+Add New Category” and type the new category name. If you want to create a hierarchical structure, select a parent category and click Add New Category.
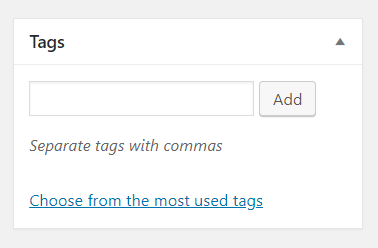
Tags are similar to categories. In categories, you can have sub-categories which means categories being broad general groupings and tags are more detailed groupings. Tags describe your post in more detail.
- Underneath categories, there is tags in the right-hand sidebar.
- If you want to use the previous tags, click on “choose from the most used tags”.
- To add a new tag, type the word that relates to your post in the tags field and click Add.
Permalink is the web address for the article. It plays an important role in how search engines rank your article. It will automatically create once you typed the title. It should contain an important keyword that relates to your post.
- Click Edit next to the permalink.
- Type in the way that you want by using only lowercase letters.
- And then click OK.
- Save it in a draft, otherwise permalink will not be updated.
Adding image to the post helps to look the content visually. The image should be related to the post.
- Place the cursor in the place where you need to add an image and click on the Add Media above the formatting toolbar.
- You can see Upload Files and Media Library.
- If you use an image that already uploaded, select from the Media Library and click Insert into Post.
- If you need to upload, click on upload files and select the file you need to upload.
- You can also resize the images from Attachment details.
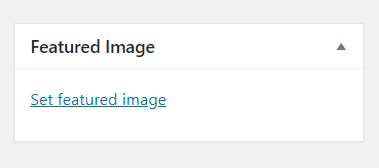
It is important to add a featured image for every post. Because it’s the main image which appears at the top of each post.
- Below the Tag section, find Featured Image.
- Click on Set Featured Image.
- Choose the image from Media Library or upload the new image as the same that you did for adding an image into the body of the post.
Everyone will eager to know our post looks when it is live. WordPress allows us to see how our post appears on live before we publish it. After completing all basic fields it’s time to look at how your website looks on the actual website.
- Click Preview on the right-hand sidebar.
- View your post and if you need to modify it, click on Edit and do needed action.
- Click Save Draft
Publish the Post
After verifying your post and it looks everything is fine. It’s the right time to publish your post.
Click Publish in the bottom of the publishing box.
RELATED ARTICLES
5 Best Premium WordPress Themes of 2025
Best Premium WordPress Themes can be subscribed & downloaded from WordPress theme clubs paid for monthly/yearly at times with offers.
5 Best Security Plugins for WordPress in 2025
Best security plugins for wordpress which has best outlook to safeguard wordpress website, so the security threats are no longer an issue
Best Alternatives for WordPress Content Management System in 2025
WordPress Alternatives 2019 that are best enough to replace one with the other as content management system – CMS used for business websites.
Top 10 Stock Video Websites for WordPress Sites
There are several stock video websites available on the web. In this article, we will tell you about the best stock video websites for WordPress websites.
How to install a Plugin in WordPress? – Step by Step Guide
To Install plugin in wordpress in one of the easy process to go through. Provided a step-by-step guide for the installation in wordpress
How to disable Plugin Deactivation in WordPress?
Disable Plugin Deactivation is a must-know thing for WordPress user, there are three methods in disabling the deactivation for a plugin.


